
A SAW machine does more than feed wire and supply current: the welding head, flux system, travel mechanism, work return and controls must work together to keep the arc covered and the bead on track. By following the process from joint preparation through inspection, you can build a reliable setup, select defensible parameters and recognise defects before they become production problems.
Key takeaways
- Keep the arc fully covered with dry, correctly matched granular flux.
- Check alignment, contact-tip condition, polarity, grounding and wire feed before welding.
- Match wire, flux, current, voltage and travel speed to the joint and weld size.
- Recover, screen and store unused flux while inspecting the system after each operation.
What happens beneath the flux during SAW welding?
The submerged arc welding process hides the arc beneath a blanket of granular flux. A continuously fed bare wire electrode enters through the contact tip, and the power source strikes an arc between the wire and workpiece.
The arc melts the wire and joint edges into a molten pool while the flux shields them from atmospheric contamination.
As the welding head moves, unused flux insulates the arc, limits radiation and spatter, and melts into a protective slag layer over the cooling bead. The slag must later be removed; it is not part of the finished weld. Keep the blanket continuous, because exposed arc areas cause unstable shielding and inconsistent penetration.
- Power source: supplies controlled welding current and voltage for arc initiation and sustained melting.
- Wire feeder: drives electrode wire at the selected feed speed; poor feeding causes arc fluctuations.
- Contact-tip assembly: transfers current into the wire and fixes its electrical extension and alignment.
- Flux hopper and delivery tube: place enough granular flux ahead of the arc to maintain coverage.
- Travel carriage or tractor: moves the welding head at a steady speed along the joint.
- Work-return connection: completes the welding circuit; a loose connection produces erratic arc behaviour.
- Flux recovery system: collects unused flux after travel for approved screening and reuse.
At the end, the control system stops wire feed, current, travel and flux flow in sequence. The slag is then chipped or lifted away for bead inspection.
How do you prepare and check a SAW welding setup?
Start with a qualified WPS: confirm the electrode and flux classifications, wire diameter, polarity, current, voltage, wire-feed speed, travel speed and joint backing before preparing the SAW welding setup.
1. Clean the joint faces to remove mill scale, oil, rust and moisture. A contaminated groove can trap gas and create porosity.
2. Check fit-up against the WPS. Measure root opening, groove angle, alignment and mismatch; excessive gaps risk burn-through, while a closed root can cause incomplete penetration.
3. Install the specified backing. Copper, ceramic, permanent backing or a deposited root pass must support the molten pool without blocking required penetration.
4. Support and clamp the workpiece so its joint stays level and cannot sag, shift or lift during carriage travel.
5. Attach the work-return cable to clean metal close to the weld. Verify continuity; a loose connection produces arc instability and uneven penetration.
6. Mount the wire reel in the correct feed direction, set its brake, and thread the wire through straighteners and drive rolls without sharp bends.
7. Inspect the contact tip for wear, then position it on the joint centreline at the WPS-specified work angle and wire extension.
8. Clean the flux hopper, delivery tube and screen. Remove damp, compacted or contaminated flux before filling the hopper.
9. Set enough flux depth to bury the arc completely and maintain a continuous blanket; exposed arc light signals inadequate coverage.
10. Align the carriage or tractor with the joint and check that wheels, guide rollers and the welding head track without side drift.
11. Perform a dry-run with the arc disabled. Confirm wire alignment, carriage travel, start-and-stop positions, flux flow and coverage before striking the arc.
How do you choose SAW wire, flux and welding parameters?
Plate thickness and joint geometry set the required deposition rate, penetration and access, so select a qualified WPS before choosing consumables. Thick plate, narrow grooves and long joints often favour larger wire and higher current; thin plate, tight root gaps or short welds require smaller wire, lower current and controlled travel speed.
Groove angle, root opening, backing and the number of passes matter as much as thickness.
Buy wire and flux as a qualified pair. AWS A5.17/A5.17M covers carbon-steel SAW electrodes and fluxes; AWS A5.23/A5.23M covers low-alloy-steel combinations. Match the classification, deposited-metal chemistry, impact toughness and hydrogen requirements to the WPS, not merely the wire diameter.
| Polarity | Practical effect | Selection point |
|---|---|---|
| DCEP | Deeper penetration and stable operation | Use when the WPS requires penetration |
| DCEN | Higher deposition rate with less penetration | Use for deposition-focused work with adequate fusion |
| AC | Balances penetration and deposition, with less arc blow | Use when arc stability or magnetic control is difficult |
On constant-voltage saw welding machines for process control, wire-feed speed chiefly sets current and deposition rate; voltage controls arc length and bead width, while travel speed controls bead size and heat per length. Adjust them together.
Estimate arc energy with Q = 0.06VI/v, where V is volts, I amperes and v millimetres per minute; apply process efficiency for net heat input, then verify interpass temperature and weld profile. Do not exceed manufacturer data or the qualified WPS.
What does a complete SAW welding operation look like?
A complete SAW welding operation begins with the operator confirming flux flow, wire alignment, contact-tip extension and work-return continuity before striking the arc. During welding, the flux blanket must remain continuous; the operator follows the slag profile, bead edges and carriage position because the arc stays hidden.
1. Start the arc with the carriage stationary or under the programmed start sequence, then verify that granular flux covers the arc immediately. Exposed arc indicates interrupted delivery, an empty hopper or an obstructed tube.
2. Engage carriage travel and watch tracking, wire cast or helix, contact-tip angle and electrode position over the joint. Contact-tip wear, misalignment or poor return connections can cause arc instability and wandering bead placement.
3. Maintain the specified wire-feed speed, voltage, travel speed and flux depth. Excessive voltage or travel speed can produce undercut; low heat input, fast travel, a wrong work angle or dirty sidewalls can cause lack of fusion.
4. Collect unused flux with the recovery system without mixing it with slag or floor contamination. Damp or contaminated flux, surface dirt and thin coverage promote porosity.
5. At the programmed stop, fill the crater as specified, stop travel and wire feed, then extinguish the arc and close flux delivery. Let the weld cool enough for safe slag removal.
6. Remove all slag from starts, stops and sidewalls before the next pass. Trapped slag or an irregular previous bead can create slag inclusions.
Inspect each pass for profile, fusion and defects before proceeding, then complete the final visual check and required nondestructive testing.
How do you keep flux, recovery equipment and the welding system reliable?
Keep flux dry, identified by lot, and off the floor in sealed packaging; moisture, oil, rust and mill scale can cause porosity, hydrogen pickup or hydrogen-assisted cracking. Dry or rebake agglomerated and fused flux only at the temperature and time specified by the flux manufacturer, because their handling requirements differ.
Screen reclaimed flux before reuse to remove slag, fines and foreign material. Dry it as specified, record its source, and blend it with a defined proportion of new flux; do not return unlimited reclaimed material to the hopper.
Clean the hopper, metering gate and delivery tube at each shift change or sooner when flow becomes uneven. A blocked tube breaks the flux blanket, exposing the arc and producing unstable shielding, spatter and excessive radiation.
Check the work-return cable, lug and contact surface for heat damage, looseness, paint and rust. Provide local exhaust ventilation and keep fume extraction clear; submerged arc does not eliminate welding fumes.
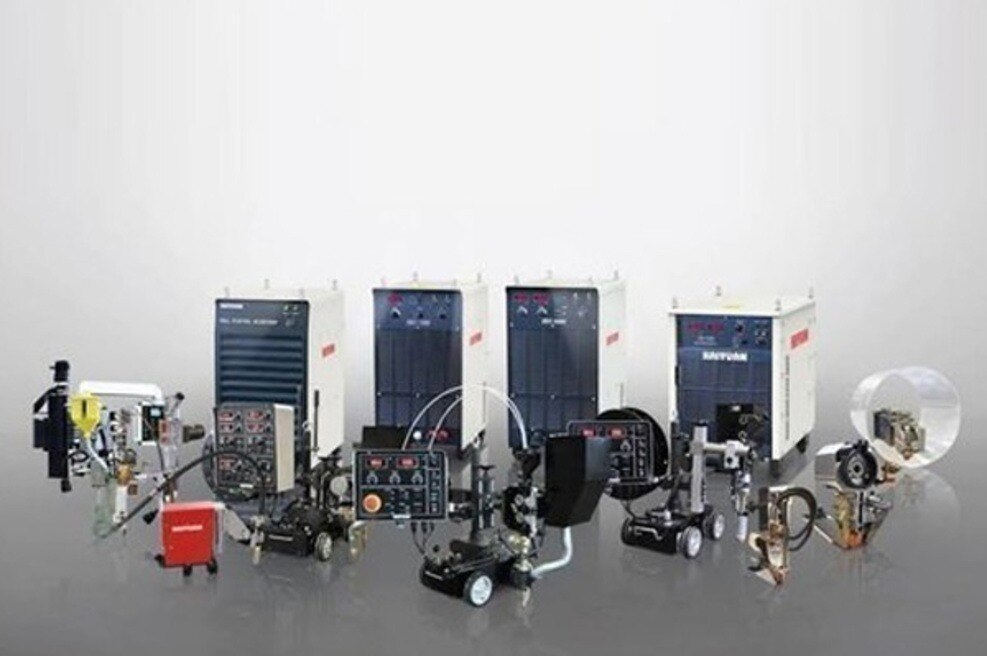
Compare complete systems against these practical controls:
| Feature | What to verify | Why it matters |
|---|---|---|
| Power source and feeder | Rated output, duty cycle and wire-size range | Prevents overload and unstable feeding |
| Travel carriage | Tracking accuracy, speed range and alignment adjustment | Controls bead placement |
| Flux system | Hopper capacity, flow control and recovery filtration | Maintains consistent coverage |
| Service support | Consumables, spare parts and repairs | Reduces production stoppage |
Weld Tech Corporation can be considered for one-supplier sourcing, but the wire–flux classification and qualified WPS remain the deciding controls.
Related product
 | SAW Welding Machines Power Source DC 3 Phase (1200 amp) Welding Type Submerged Are Welding Phase 3 Phase Kaiyuan Brand 1200 amp Thyristor Ed Controlled DC SAW Welding... View product → |
Frequently asked questions
What happens beneath the flux during SAW welding?
A continuously fed bare wire forms an arc beneath granular flux. The flux shields the arc, melts into a protective slag, and helps shape the weld pool.
How do you prepare and check a SAW welding setup?
Inspect the power source, wire feeder, contact tip, electrode alignment, work return, flux delivery and joint fit-up before striking the arc.
How do you choose SAW wire, flux and welding parameters?
Select wire and flux as a compatible combination, then set current, voltage, polarity, wire-feed speed and travel speed for the material, joint and required weld size.
What does a complete SAW welding operation look like?
The operator prepares the joint, lays a continuous flux blanket, starts the arc, controls travel and wire feed, then removes slag and inspects the finished weld.
How do you keep flux, recovery equipment and the welding system reliable?
Keep flux dry and uncontaminated, screen recovered material, empty recovery filters, replace worn contact parts and check cables, hoses and controls routinely.