
A nozzle can look dirty when the real fault is a blocked diffuser, misaligned contact tip, leaking gas line or damaged insulator. By the end, you will be able to identify the failure type, decide between cleaning and replacement, verify a Panasonic nozzle against the complete torch assembly, and stock the surrounding spares that prevent repeat stoppages.
Key takeaways
- Cool and isolate the torch before judging nozzle damage.
- Check contact tip alignment, gas flow, and diffuser condition before replacing the nozzle.
- Match a Panasonic nozzle to the complete torch assembly and wire size.
- Keep documented front-end spares with batch and compatibility details.
Diagnose the nozzle before ordering a spare
Decide the nozzle’s fate only after isolating power and letting the torch cool. A blue or brown surface alone is not proof of failure; copper-alloy parts discolour under heat.
1. Inspect the bore, mounting face, threads, insulator and the nozzle’s concentricity with the contact tip. Remove loose spatter with a nozzle-cleaning tool or soft brush. Never use a drill, reamer, chisel or abrasive tool that enlarges the bore.
2. Clean the nozzle when spatter is loose and the bore, threads and seating face remain round and undamaged. Do not resurface or straighten the conical shell. A nozzle that has been collision-bent, mechanically enlarged, badly distorted, cracked, loose or electrically contaminated is unserviceable.
3. Check the surrounding conical nozzle repair parts after a collision or burnback: diffuser, insulator, retaining ring, nozzle holder, O-ring and contact tip. Replace damaged parts; changing only the outer nozzle can leave the fault in place.
4. Investigate the wider torch when new nozzles repeatedly distort, spatter heavily or lose concentricity. Check the diffuser seat, contact-tip position, liner, wire path, torch neck alignment, cooling and collision cause before ordering another shell. A nozzle touching the tip can cause arcing and burnback.
Trace poor shielding and unstable arc back to the torch front end
Porosity, surface oxidation and an unstable arc do not prove the nozzle is defective. Spatter can narrow the nozzle outlet and disrupt shielding, while a displaced contact tip can touch the nozzle, causing intermittent arcing, burnback and erratic wire feeding.
1. Isolate power and let the torch cool. Remove loose spatter with a nozzle-cleaning tool or soft brush; do not drill, ream or abrade the bore. A narrowed or distorted outlet changes gas coverage.
2. Check the front end for contact. Confirm that the tip is fully seated in the diffuser, the wire exits centrally, and the tip recess and wire stick-out match the welding procedure. Inspect the nozzle, diffuser and insulator after a collision.
3. Follow the wire path backward. Check the liner, drive-roll pressure, contact-tip wear and torch neck alignment with the joint. Resistance or misalignment can create spatter that makes a sound nozzle appear to fail.
4. Measure shielding-gas flow at or near the torch, not only at the regulator. Inspect the diffuser, hose, fittings, O-rings, solenoid, regulator, flowmeter and supply for blockage or leaks, then check for drafts.
5. Set flow from the welding procedure and torch documentation. Gas composition, current, nozzle geometry, joint access and travel speed determine the setting; excessive flow can create turbulence instead of better shielding.
Match a Panasonic replacement to the complete torch assembly
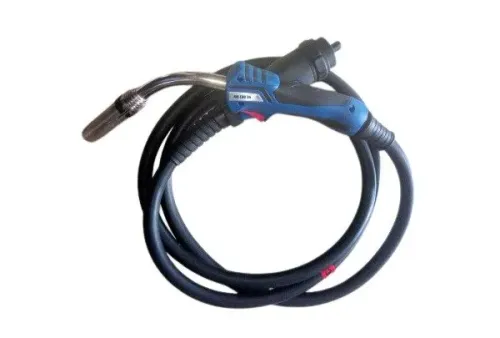
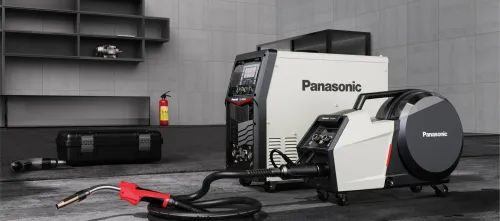
Fit is confirmed by the complete torch identity, not the welding-machine model alone. Record the Panasonic torch series, gun neck, nozzle part number, fitting or thread, diffuser seating method, bore diameter, overall length, conical angle, material and welding-current range.
| Shape | Record and compare | Why it matters |
|---|---|---|
| Straight | Bore, length, seating face and retaining method | Preserves the specified gas outlet and electrode position |
| Tapered | Taper dimensions, bore, length and diffuser interface | A different taper can restrict joint access or alter shielding |
| Conical | Conical angle, bore, length and seating depth | A generic replacement can leak gas or shift the contact-tip position |
Compare the existing part with the torch manual or supplier drawing. Check the contact-tip thread, extension and bore at the same time; a worn tip can make a sound nozzle appear faulty.
A genuine Panasonic nozzle replacement provides a traceable part number and defined interface. A generic nozzle requires dimensional and process validation before qualified production use, because a close-looking part can leave a poor gas seal or change shielding. Record the installed replacement and its lot or supplier traceability whenever the change could affect weld results.
Choose the front-end spare for the job and replace it safely
Replace only the conical nozzle when it is cracked, distorted or contaminated beyond cleaning, while the diffuser, insulator, threads and seating remain sound. Use the specified conical nozzle for mild-steel MIG/MAG work when its angle and bore provide the required joint access and shielding.
A cylindrical nozzle suits confined joints only when the torch documentation and welding procedure approve that geometry; altered coverage can cause porosity.
| Option | Replace | When it applies |
|---|---|---|
| Conical nozzle | Nozzle only | The shell is damaged, but mating parts remain sound |
| Diffuser, insulator, retaining part or O-ring | Damaged component | One replaceable part is worn, cracked, leaking or contaminated |
| Complete front end | All matching parts | Several parts are worn, threads are damaged, or concentricity cannot be restored |
Use this sequence to prevent a replacement failure:
- Isolate power, stop the process and cool water-cooled equipment where applicable.
- Close the gas supply and remove the retaining part with the correct tool.
- Clean mating surfaces without scratching them, then inspect the diffuser and insulator.
- Install the nozzle without cross-threading. Tighten it using the torch maker’s specified method; do not force it with pliers.
- Reopen the gas supply, perform a gas-flow check at or near the torch, and test for leaks before welding.
Prevent repeat failure with a controlled spare-parts kit
Prevent repeat failure by controlling the complete torch front end, not by storing nozzles alone. Keep a compatibility record for the torch model, nozzle and contact-tip part numbers, diffuser, insulator, retaining component, liner-related parts and the correct cleaning tool.
Replenish it after a collision, repeated nozzle cleaning, visible bore distortion, porosity after gas checks, burnback or an unexpected rise in changeover time.
- Record rejected welds, rework, stoppage minutes and changeover time; use those figures to set the site-specific minimum stock level.
- For welding machine spares for nozzle failure in Ahmedabad, send the machine and torch model plates, nozzle dimensions, thread or seating style, bore, length, wire diameter and material, clear front-end photographs and the package part number.
- Ask Weld Tech Corporation whether local collection or delivery is available, whether the part is genuine or generic, and which diffuser and contact tip it fits.
| Repeated symptom | Check before ordering more nozzles | Likely cause |
|---|---|---|
| Heavy spatter | Current, transfer and arc settings, stick-out and tip alignment | Excessive current, unsuitable settings or long arc time |
| Tip damage or burnback | Liner, drive rolls, wire-feed resistance and contact-tip seating | Restricted feeding or misalignment |
| Distortion after welding | Cooling circuit and collision-prevention practice | Inadequate cooling or collision risk |
| Spatter returns quickly | Gas flow, torch alignment and front-end geometry | A nozzle shortage is not the root fault |
Related product
 | Welding Spare Parts We are Manufacturer, Distributor, Supplier of Welding Spare Parts View product → |
Use a procurement checklist before the torch stops
Approve a Panasonic nozzle order only when the supplier’s drawing or product identification matches the installed torch, not just the welding-machine nameplate. A similar-looking nozzle can alter seating depth, gas coverage and electrode position, producing porosity, rejected welds and rework.
Confirm each item before approval:
- Panasonic torch model, gun neck and nozzle part number
- Straight, tapered or conical shape; bore, length, conical angle, material and current range
- Thread or push-fit arrangement, diffuser interface and insulator design
- Matched contact-tip and diffuser part numbers
- O-rings, retaining ring or holder, and the correct cleaning tool where the torch uses them
| Panasonic nozzle replacement checks | Verified order | Risky order |
|---|---|---|
| Torch identification | Model and gun neck match the installed assembly | Machine nameplate only |
| Front-end geometry | Drawing confirms bore, length, angle and seating | Visual similarity |
| Mating parts | Tip, diffuser, insulator and retaining parts agree | No interface confirmation |
| Traceability | Part number, package label and lot or supplier record supplied | Unrecorded substitution |
If the original part number is unclear, request photographs of the supplied nozzle and package label. Ask how substitutions, compatibility questions, traceability, delivery and collection are handled. Approve the order after the front-end dimensions and mating parts agree.
Frequently asked questions
How do you diagnose a welding nozzle before ordering a spare?
Isolate power, let the torch cool, then inspect the nozzle for spatter, dents, cracks, blocked openings, ovality, and heat damage. Surface blueing or browning alone does not prove failure.
How can the torch front end cause poor shielding or an unstable arc?
Inspect the nozzle, diffuser, contact tip, liner connection, gas passages, and tip alignment. Spatter, restriction, leaks, loose parts, or an incorrect stand-off can disturb shielding and arc stability.
How do you match a Panasonic replacement nozzle to the torch assembly?
Confirm the Panasonic torch model, nozzle thread or mounting style, contact-tip system, wire diameter, nozzle bore and length, and the required welding process before ordering.
What belongs in a controlled welding machine spare-parts kit?
Keep compatible nozzles, contact tips, diffusers, insulators, nozzle springs or retainers where used, liners, O-rings, and cleaning tools. Record part numbers, quantities, storage locations, and reorder levels.