
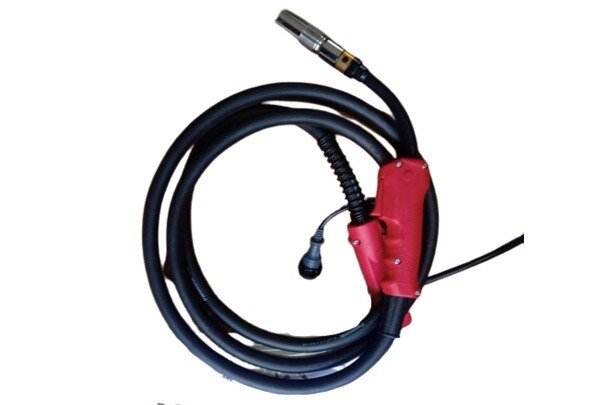
A MIG torch fault can begin with a cheap contact tip and end with damaged wiring, poor shielding, or an overheated torch body. You will be able to isolate the fault, recover the torch safely, and decide when consumable replacement is no longer enough.
Key takeaways
- Isolate power, close the gas valve, release pressure, and secure the torch before inspection.
- Check the liner, contact tip, nozzle, wire path, and drive-roll alignment for feeding faults.
- Restore shielding gas flow and inspect leaks before testing arc stability.
- Use industrial torch service when cable, trigger, robot mount, or internal damage remains unresolved.
Start With a Safe Fault-Triage Sequence
Stop welding and secure the power source before investigating panasonic mig welding torch problems. Close the shielding-gas cylinder valve, release line pressure, and isolate electrical power. A hot torch, live trigger circuit, or moving wire can injure you while you inspect the fault.
1. Record the symptom: no arc, unstable arc, burnback, bird-nesting, wire slipping, spatter, porosity, gas leakage, overheating, or intermittent triggering. Note whether it appears cold, hot, or only when the robot moves.
2. Inspect the nozzle, contact tip, diffuser, and swan neck. Remove spatter, check that the tip matches the wire diameter, and replace a damaged or loose tip. Do not keep increasing drive-roll pressure to overcome resistance; it can crush wire and create shavings.
3. Check the liner, inlet guide, outlet guide, and drive rolls for contamination, wear, kinks, and incorrect size. Remove the liner or use the Panasonic-approved cleaning method. Do not blast compressed air through the assembled torch, because debris can enter the gas diffuser or coolant circuit.
4. Trace the torch cable from the feeder or Euro connector to the neck. Look for sharp bends, crushed sections, collision marks, loose plugs, and damaged trigger wiring.
5. For a water-cooled torch, verify reservoir level, inlet and return flow, hose condition, pump operation, and the cooling-unit alarm. Stop immediately if coolant circulation is absent.
This sequence supports panasonic mig welding for torch applications without treating every fault as a consumable failure. If the torch becomes hot, leaks gas, loses trigger control, or shows exposed conductors, remove it from service rather than testing it under load.
Find Wire-Feed Faults in the Torch Path
Separate a torch-path fault from a feeder fault by checking where resistance begins. With power isolated, remove the nozzle and contact tip, inspect the inlet and outlet guides, and jog the wire only under the machine manufacturer’s approved procedure.
Smooth movement at the feeder but hesitation through the torch points to the torch path; surging before the wire enters the torch points to the feeder.
| Fault | Sign | Confirmation |
|---|---|---|
| Liner | Motor surges, wire stalls, or kinks near the neck | Remove and inspect the liner for rust, wire shavings, or a crushed section. Replace it; do not blow debris deeper with compressed air. |
| Contact tip | Drag appears only after the tip is installed, or burnback occurs | Fit a tip matched to the actual wire diameter and alloy. A tight bore drags; an eroded bore causes unstable transfer. |
| Drive roll | Wire slips, flattens, or produces filings | Check the groove profile, alignment, and pressure. More pressure can worsen contamination and shaving. |
| Cable or neck | Feeding changes when the cable bends or the neck moves | Straighten the cable, then inspect for sharp bends, crushed sections, and damaged guides. |
| Feeder | Fault remains with a confirmed clear torch path | Check spool-brake tension, drive-roll motor, pressure-arm movement, encoder, and feeder controls. |
Aluminium wire exposes liner and cable friction quickly because it is soft. If wire exits the drive rolls smoothly but repeatedly stops at the torch inlet, stop increasing pressure and replace the restricted component before resuming welding.
Restore Arc Stability and Shielding Gas
Correct burnback at the contact tip before condemning the torch. A damaged tip, unstable wire feed, excessive tip-to-work distance, incorrect burnback timing, poor work return, or a loose power connection can all create it; repair the specific fault and retest rather than replacing the complete torch.
Use this welding torch recovery sequence:
- Fit the correct contact-tip size, clear spatter from the nozzle and diffuser, and replace cracked, loose, or badly worn parts.
- Check liner resistance, inlet and outlet guides, drive-roll condition, and cable bends. Do not solve slipping wire by increasing drive-roll pressure alone; contamination and wire shavings can worsen.
- Remove nozzle spatter before diagnosing porosity or an unstable arc. Test gas flow at the torch, not only at the regulator; a common GMAW starting range is about 12–20 L/min, adjusted for gas, nozzle, current, joint access, and draughts.
- Trace leaks through the gas hose, torch connector, diffuser, and solenoid. Low flow causes porosity, while excessive flow creates turbulence that draws in room air.
- Check the work clamp and machine-side power connection when the arc surges, crackles, or cuts out. Tighten or replace the faulty connection.
- On a robot, restore the specified dress-pack bend path, slack, and strain relief. Wrist bending, clamp compression, or collision damage can affect the liner, power conductor, or trigger wiring.
If these checks leave the arc unstable, stop welding and record whether the fault appears cold, hot, or only during robot motion. These details distinguish a replaceable consumable from deeper Panasonic MIG welding torch problems.
Check Heat, Trigger, Cable, and Robot-Mounted Damage
Remove the torch from service when heat causes discolouration, softened insulation, a burning smell, or a handle and neck too hot to hold safely. Do not continue welding to “use up” a contact tip; heat damage can reach the power conductor, trigger wires, gas hose, or coolant circuit.
Treat these findings as stop-use conditions:
- A trigger works only when the cable is twisted, pressed, or held at one position. The wire may pass a static continuity test yet open or develop high resistance during movement.
- The torch loses power, surges, or becomes hot at the Euro connector, machine-side plug, or cable joint. Inspect for arcing, loose pins, and insulation damage.
- A robot dress pack is crushed by a clamp, stretched at the wrist, kinked below its minimum bend path, or damaged after a collision. Restore slack, bend routing, and strain relief before testing.
- Gas escapes from the rear connector, hose, diffuser, liner casing, or solenoid interface. Perform a low-pressure leak test with the trigger released and actuated; a leak that appears only with gas flow still removes the torch from service.
- Coolant leaks, flow is restricted, or the torch overheats at the rated welding duty cycle.
Industrial torch service should flex the cable through its full robot path, then check resistance or voltage drop under load. After a collision, verify the neck, nozzle alignment, contact-tip position, work-return connection, and TCP before returning the torch to production.
Decide Between Consumable Replacement and Industrial Service
A replacement torch is the right request only when the fault remains after correct consumable selection, wire routing, and connection checks. Give the supplier enough detail to match the torch electrically, thermally, and mechanically—not merely by appearance.
1. Record the Panasonic welding-machine or robot model, the existing torch model, air- or water-cooled design, rated duty cycle, wire diameter and material, shielding gas, welding current, torch-side connector, neck geometry, cable length, and consumable family.
2. Describe the failure precisely: no arc, unstable arc, burnback, gas leakage, overheating, intermittent trigger, or faults that appear only when the torch is hot or moving. Add the fault code, photographs of the neck and connector, and a short video if robot motion affects the problem.
3. Request industrial torch service when the inspection must cover hidden cable faults. The technician should flex the power cable, trigger wires, gas hose, and coolant hoses through their operating range, then check continuity, resistance, or voltage drop under load where appropriate.
4. Replace consumables for a worn nozzle, contact tip, diffuser, liner, or neck. Stop using the torch and seek service for insulation damage, persistent gas or coolant leakage, failed trigger wiring, a damaged power conductor, or repeated failure after correct consumables and routing.
For mig torch maintenance in Pune, keep spare liners, tips, diffusers, nozzles, and connectors sealed and dry against monsoon moisture, grinding dust, and temperature cycling. Weld Tech Corporation can use the recorded model and fault details to distinguish a suitable replacement from a serviceable torch body.
Related products
 | MIG Welding Torch We are Manufacturer, Distributor, Supplier of MIG Welding Torches, MIG Welding Torch View product → |
 | MIG Welding Torch We are Manufacturer, Distributor, Supplier of MIG Welding Torches, MIG Welding Torch View product → |
Frequently asked questions
What should you do first when Panasonic MIG welding torch problems appear?
Stop welding, secure the power source, close the shielding-gas cylinder valve, release line pressure, and isolate electrical power before inspection.
Which torch parts should you check for MIG wire-feed faults?
Inspect the liner, contact tip, nozzle, wire path, and drive-roll alignment for blockage, wear, misalignment, or damage.
How do you restore arc stability and shielding gas?
Check the gas supply and flow path for leaks or restrictions, then inspect the torch consumables and connections before testing the arc.
When should you choose industrial torch service instead of replacing consumables?
Choose industrial torch service when faults remain after consumable replacement or when the cable, trigger circuit, robot mount, or torch body is damaged.